

What You Will Need
Collect everything before beginning so you do not have to search for supplies while wearing dirty gloves.
Preparing your supplies in advance makes how to clean a messy kitchen much faster and more organized.
Useful supplies include:
- Strong rubbish bags
- Rubber or disposable gloves
- Dishwashing liquid
- Clean sponges or dish brushes
- Microfiber cloths
- Paper towels
- A scraper suitable for the counter material
- A bucket or washing-up bowl
- Multipurpose kitchen cleaner
- A food-contact-surface sanitizer
- Baking soda for gentle scrubbing
- Broom or vacuum
- Mop and floor cleaner
- Laundry basket or empty container
- Clean dish towels
- A small box for items that belong elsewhere
Open a window or use mechanical ventilation if it is safe to do so. Wear closed shoes to protect your feet from broken dishes, sharp utensils, and spills.
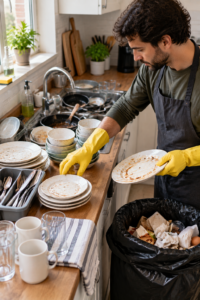
How to Clean a Messy Kitchen Step by Step
Step 1: Take a Quick Photograph
The easiest approach to how to clean a messy kitchen is to divide the room into small, manageable zones.
A before photograph is optional, but it can provide motivation and help you see your progress.
Do not share a photograph of somebody else’s home without permission. The image should be used to track progress, not shame the person who lives there.
Set a realistic goal. If the room is extremely cluttered, completing it in several short sessions may be safer and more manageable than trying to finish everything at once.
Step 2: Turn Off and Check the Appliances
Confirm that the oven, hob, toaster, coffee maker, and other countertop appliances are switched off. Unplug small appliances before moving or wiping them, following the manufacturer’s instructions.
Do not immerse electrical appliances in water. If liquid has entered an appliance, leave it unplugged and have it inspected when necessary.
Clear combustible clutter away from the hob and oven before starting any other task. Paper towels, cardboard, plastic packaging, and greasy cloths should never be left close to a heat source.
Step 3: Remove Rubbish and Spoiled Food
When learning how to clean a messy kitchen, removing rubbish first creates immediate space and visible progress.
The first major step in how to clean a messy kitchen is reducing the volume of material in the room.
Walk around with a rubbish bag and remove obvious waste:
- Empty food wrappers
- Used paper towels
- Empty disposable containers
- Spoiled leftovers
- Mouldy food
- Used tea bags
- Broken disposable items
- Food scraps
- Packaging that cannot be recycled
Do not reach blindly into crowded areas. Knives or broken glass may be concealed underneath plates and packaging.
Use a rigid container for broken glass rather than dropping loose shards into a thin rubbish bag. Follow local disposal rules for glass, sharp objects, batteries, medications, and hazardous products.
Tie full bags securely and remove them from the kitchen. Do not leave leaking rubbish on the floor while you continue cleaning.
Step 4: Put Away Food That Is Still Safe
Separate food from cleaning supplies before spraying anything.
Return unopened shelf-stable products to the pantry. Put safe refrigerated items back in the refrigerator immediately. When storage history is uncertain, use caution with meat, seafood, dairy products, cooked leftovers, and cut produce.
Do not assume that food is safe simply because it smells normal. Pathogenic bacteria may be present without producing an obvious odor.
If perishable food has remained at room temperature for too long or you cannot determine how long it has been out, discarding it is generally safer than tasting it.
For more information about preventing contamination during food preparation, see the CDC’s official guidance on the four steps to food safety: clean, separate, cook, and chill.
Step 5: Sort the Dishes
Do not begin by filling the sink with everything. A large, unstable pile can conceal sharp objects and make the task more difficult.
Sort items into groups:
- Glasses and cups
- Cutlery
- Plates and bowls
- Pots and pans
- Food-storage containers
- Fragile objects
- Knives and sharp tools
Place knives separately with the blades visible and pointing away from you. Never leave knives hidden in cloudy washing water.
Scrape leftover food into the rubbish or compost according to local rules. Do not force grease, rice, pasta, coffee grounds, or large food scraps down the drain.
If you have a dishwasher, check that it is empty and functioning. Load only dishwasher-safe items, keeping delicate objects, wooden utensils, cast iron, and unsuitable cookware out.
For additional maintenance ideas, naturally link this section to your existing dishwasher-cleaning guide.