
Chocolate Hazelnut Cake with a Soft Vanilla Crumb
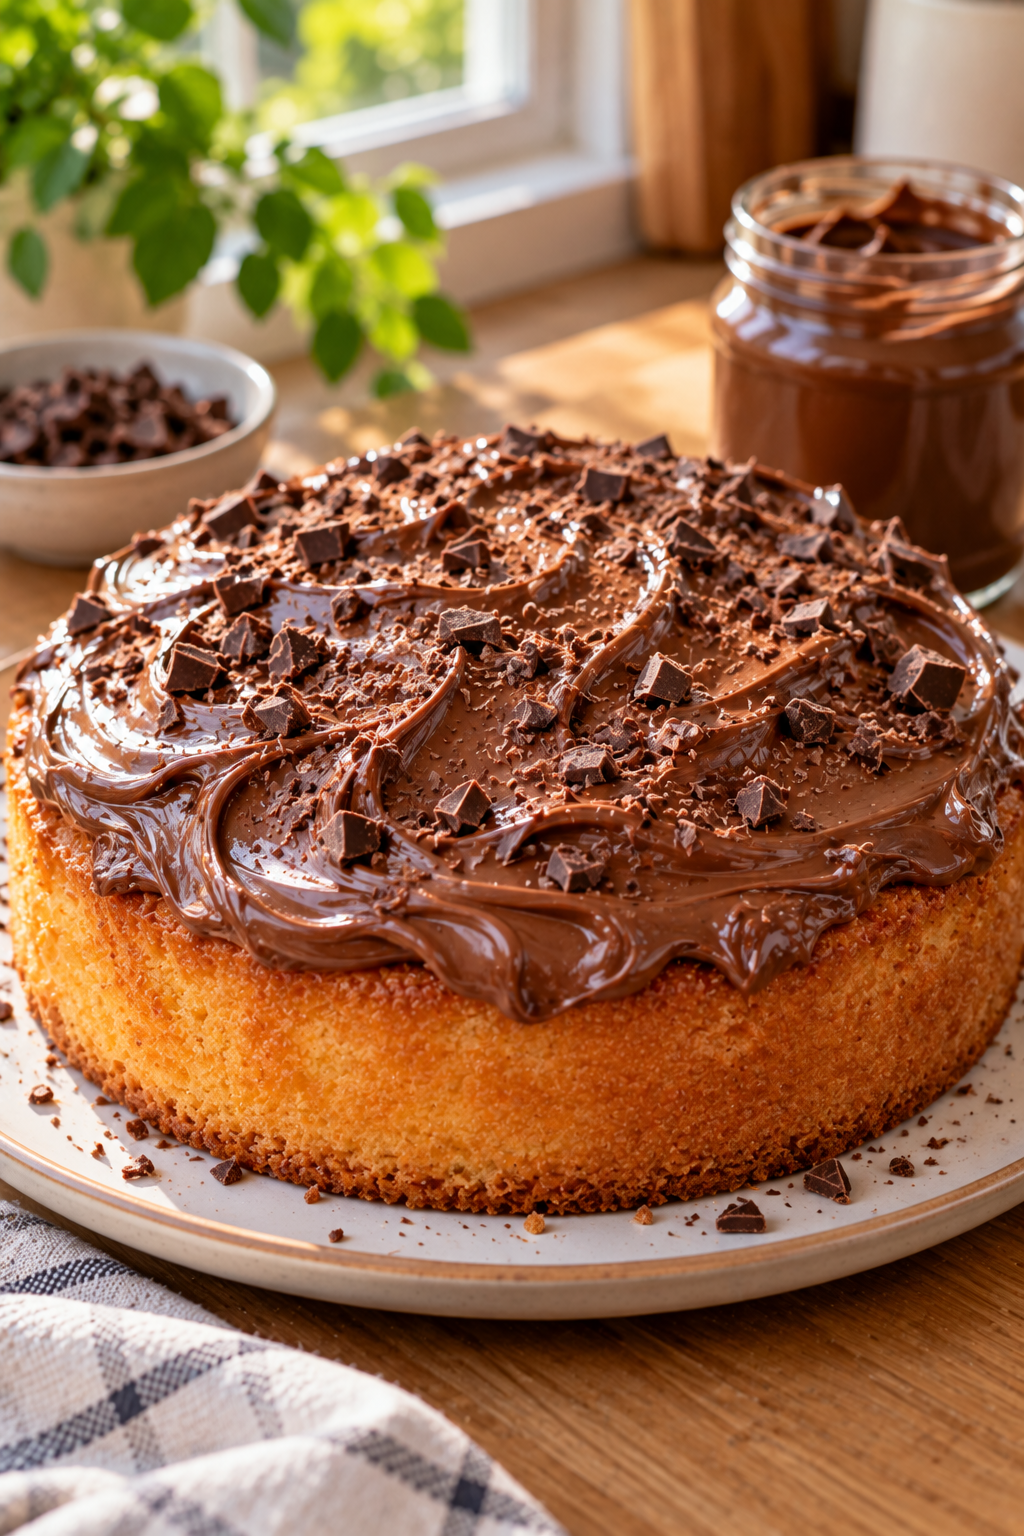
A thick swirl of chocolate hazelnut spread can turn a simple homemade cake into the dessert everyone notices first. In the supplied photo, the cake has a golden, well-risen crumb, a generous glossy topping, and little pieces of chocolate scattered over the surface. It looks inviting without requiring layers, piping, or an elaborate filling.
This chocolate hazelnut cake takes that appearance as its inspiration. The base is a soft vanilla cake baked in one round pan. Once it has cooled, you spread chocolate hazelnut spread across the top and finish it with chopped chocolate. The contrast is the appeal: light cake beneath a rich, creamy topping.
What Makes Southern Peach Buttermilk Pound Cake Special?
The image does not provide ingredient quantities or show how the cake was made, so the recipe below is an original recipe inspired by the photo. It is designed to recreate the visible style of the dessert; it should not be mistaken for the exact recipe used to make the pictured cake.
Why You’ll Love This Recipe
A single-layer cake is useful when you want a dessert that feels special but fits into an ordinary baking day. There are no separate cake layers to level and stack. The topping needs only a spoon or offset spatula, and its loose swirls suit the relaxed look of the photo.
The vanilla crumb also gives the chocolate hazelnut spread room to stand out. A strongly chocolate-flavored sponge beneath a thick chocolate topping would make a different dessert. Here, the cake and topping have distinct roles, so each forkful includes both flavors.
This recipe works well for a family dessert, an afternoon gathering, or a celebration when you want a homemade cake without a complicated decorating plan. You can bake the cake ahead and add the topping once it has cooled completely.
You will also find practical instructions for judging when the center is baked, keeping the spread from melting into a warm cake, cutting tidy slices, and storing leftovers.
What Makes This Chocolate Hazelnut Cake Special?
The topping does most of the decorating. Sweep the spread over the cake in broad strokes and leave some of the golden surface visible near the edge. A scattering of finely chopped chocolate adds texture and makes the finished cake look close to the reference image.
Because the cake itself is vanilla-flavored, you can control how rich the final dessert feels. Use a moderately thick layer of spread for balanced slices, or add a little more if you want the dramatic chocolate swirls shown in the photo.
The finishing step happens after baking. The chocolate hazelnut spread is not mixed into the batter or baked on top. Applying it to a cooled cake preserves its smooth texture and makes decorating much easier.
Ingredients
For the vanilla cake
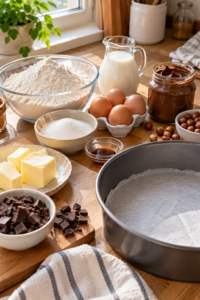
- 2 cups (250 g) all-purpose flour, also called plain flour
- 2 teaspoons baking powder
- ¼ teaspoon fine salt
- ½ cup (113 g) unsalted butter, softened
- ¾ cup (150 g) granulated sugar, also called caster sugar
- 3 large eggs, at room temperature
- 2 teaspoons vanilla extract
- ¾ cup (180 ml) milk, at room temperature
For the topping
- ¾ cup (about 225 g) chocolate hazelnut spread
- ¼ cup (about 40 g) finely chopped chocolate or chocolate curls
Equipment: One 8-inch (20 cm) round cake pan, parchment paper, two mixing bowls, an electric mixer or sturdy whisk, and a spatula.
Yield: 10 slices
Preparation time: About 20 minutes
Baking time: Approximately 35–42 minutes
Cooling and decorating time: Allow at least 1 hour for the cake to cool fully before topping.
Ingredient notes
Flour: Spoon flour into a measuring cup and level it off if you are measuring by volume. Adding too much flour can make the crumb dense. A kitchen scale gives a more consistent result.
Butter: Softened butter should yield when pressed but should not look oily or melted. Its texture matters during creaming: butter that is too cold is harder to blend smoothly with sugar.
Eggs and milk: Room-temperature ingredients mix into the butter mixture more readily. If they are cold, the batter may look slightly curdled. It can still bake, but starting with ingredients at a similar temperature makes mixing easier.
Chocolate hazelnut spread: Choose one you enjoy eating, since its flavor will be prominent. Different brands vary in sweetness, thickness, and nut content. Check the label if you need to account for hazelnuts, milk, soy, or other allergens.
Chocolate pieces: Chop a chocolate bar into small, uneven bits for a finish like the photo. Mini chocolate chips are another option, though they will give the top a different appearance.
How to Make Chocolate Hazelnut Cake
Step 1: Prepare the pan and oven
Heat the oven to 350°F (175°C). Grease an 8-inch (20 cm) round cake pan and line its base with parchment paper. Lightly grease the parchment as well.
Set the pan aside while you prepare the batter. Having it ready means the mixture can go into the oven soon after the baking powder is combined with the wet ingredients.
Step 2: Mix the dry ingredients
In a medium bowl, whisk together the flour, baking powder, and salt. Spend a few seconds distributing the baking powder evenly. This helps the cake rise consistently and avoids pockets of dry ingredients in the batter.
Step 3: Cream the butter and sugar
Place the softened butter and sugar in a large bowl. Beat for about 2–3 minutes, until the mixture looks lighter in color and fluffy. Scrape down the bowl once or twice so the butter at the bottom and sides mixes in properly.
You do not need to beat it for a long time, but give this step more than a quick stir. A well-mixed butter and sugar base helps create the soft crumb beneath the chocolate topping.
Step 4: Add the eggs and vanilla
Beat in the eggs one at a time, mixing after each addition. Scrape down the bowl, then mix in the vanilla extract.
If the batter looks slightly separated after an egg goes in, continue with the recipe. Adding the flour and milk in the next step usually brings it together. Avoid trying to fix the appearance by beating excessively.
Step 5: Alternate the flour mixture and milk
Add about one-third of the flour mixture and mix on low speed just until incorporated. Add half the milk and mix briefly. Repeat with another third of the flour, the remaining milk, and finally the rest of the flour.
Stop as soon as no dry streaks remain. The batter should be thick enough to spread into the pan while still looking smooth. Overmixing after the flour goes in can make the cake less tender.
Step 6: Fill the pan
Scrape the batter into the prepared pan and level the surface gently with a spatula. Tap the pan lightly on the counter once or twice to settle any large air pockets.
Set it on the center rack of the preheated oven. Leave enough space around the pan for warm air to circulate.
Step 7: Bake and check the center
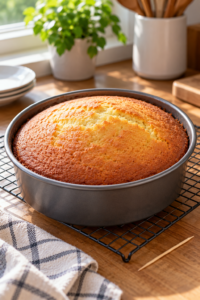
Bake for 35–42 minutes. Begin checking near the earlier end of that range, since ovens and pans vary. The cake should look golden, the center should spring back lightly when touched, and a toothpick inserted into the center should come out clean or with a few dry crumbs rather than wet batter.
If the top is browning before the center is done, place a loose piece of foil over it and continue baking, checking again after a few minutes. For more detail on combining visual and toothpick checks, see King Arthur Baking’s guide to telling when a cake is done. King Arthur Baking
Step 8: Cool completely
Let the cake sit in its pan for about 15 minutes. Run a thin knife around the edge if needed, then turn it onto a rack and remove the parchment. Allow it to cool completely before decorating.
This wait is essential for the finish shown in the photo. Spread applied to a warm cake can turn runny, soak into the surface, or pull loose crumbs into the swirls.
Step 9: Add the chocolate topping
Place the cooled cake on a serving plate. Stir the chocolate hazelnut spread in its container if it has separated, then spoon it over the top. Use the back of a spoon or an offset spatula to sweep it into broad, visible swirls.
Leave a slim border of cake uncovered, or take a little spread toward the edge for a more generous look. Scatter chopped chocolate over the topping while it is soft enough for the pieces to adhere.
Let the cake stand briefly so the topping settles, then slice with a clean knife. Wipe the blade between cuts if you want neat slices.
Tips for a Soft Cake and Glossy Topping
Measure the flour carefully
This is one of the simplest ways to improve a home-baked cake. Packed flour can turn a tender batter into a heavy one. Weigh 250 g if you can. Otherwise, spoon flour into the measuring cup and level it without pressing down.
Do not rush the cooling step
The cake may feel only slightly warm on the outside while still holding heat in the center. Give it time on a rack before adding spread. If you are baking for an event, make the cake earlier in the day and decorate it closer to serving.
Use gentle strokes when decorating
The first spoonful of spread may drag across the surface if it is very firm. Stir it until workable, then apply small portions across the top rather than forcing one large dollop over the whole cake. Sweep lightly to make the swirls while keeping crumbs in place.
Cut according to the topping
A rich topping means modest slices work well. For clean edges, use a sharp knife and wipe it between cuts. If the topping is especially soft, a short rest in a cool room can make slicing less messy.
Treat the baking time as a range
The depth of the batter, your oven, and the material of your pan can affect timing. A toothpick test in the center is more useful than deciding the cake must be done at an exact minute.
Common Mistakes and How to Fix Them
The middle sinks after baking
A cake can sink if its center was still underbaked, if the oven door was opened too early, or if the batter was mixed heavily after the flour was added. Next time, check the center with a toothpick before removing the cake and use light mixing in the final batter step.
A small dip is not a disaster for this chocolate hazelnut cake. Once the cake is fully baked and cooled, the topping can cover an uneven surface.
The crumb is dry
Too much flour or extra baking time may be the cause. Measure carefully and begin checking at 35 minutes. Remove the cake when the center is baked; waiting for an already-done cake to become darker can dry it out.
The topping slides off
The cake was likely too warm, or the spread was made too fluid before application. Cool the cake fully and use the spread at a workable room temperature. You want it soft enough to swirl but thick enough to stay on the surface.
Crumbs mix into the chocolate
Make the first strokes lightly and avoid repeatedly scraping the same spot. Place several small spoonfuls of spread around the top before joining them into larger swirls.
The chocolate pieces will not stay put
Sprinkle them on as soon as you finish spreading the topping. Press only very lightly if needed; heavy pressure can flatten the swirled surface.
Variations and Substitutions
Add toasted hazelnuts
For more crunch and a clearer hazelnut flavor, scatter a small amount of chopped toasted hazelnuts over the finished topping. This changes the look from the reference photo but suits the flavors. Let guests know the cake contains nuts.
Use chocolate curls
Shave a chocolate bar with a vegetable peeler for a finer finish. Chocolate curls make the cake look dressier, while roughly chopped pieces give it a casual homemade appearance.
Make smaller servings
You can bake this batter as cupcakes, but the baking time will be shorter. Begin checking them well before the round cake’s baking range and add the chocolate hazelnut spread only after they have cooled. The result will be easier to portion for a party, though it will not match the single round cake shown in the photo.
Change the finish
A small dusting of cocoa powder or a few fresh berries can give the finished cake a different presentation. Add berries shortly before serving so the topping retains its appearance.
If you are planning more than one dessert, a light fruit option alongside this cake gives guests a choice. You can browse VeloraTaste’s recipes for ideas that suit the rest of your menu.
How to Serve Chocolate Hazelnut Cake
Serve the cake at a comfortable room temperature so the topping is smooth and the crumb tastes soft. It needs no extra sauce, but a small spoonful of plain whipped cream can balance the richness. Keep whipped cream chilled and add it when serving rather than storing it on the cake.
For an afternoon treat, cut the cake into modest wedges and offer coffee or tea. For a celebration, bring the whole cake to the table first so everyone can see the chocolate swirls, then slice it.
The cake can also be decorated just before guests arrive. Bake and cool the base in advance, keep it covered, and spread on the topping when you are ready. That timing gives the surface the fresh, glossy look seen in the image.
Storage, Freezing, and Make-Ahead Instructions
Storing the finished cake
Cover the cake to keep the crumb from drying out. With the simple chocolate hazelnut spread topping specified here, follow the storage instructions on your spread’s label and keep the cake in a cool place for a short period if those instructions permit it. For longer storage, refrigerate the covered cake and allow a slice to lose some of its chill before serving.
If you add whipped cream, cream cheese frosting, custard, or another perishable filling or topping, refrigerate the cake promptly. FoodSafety.gov advises keeping the refrigerator at 40°F (4°C) or below and refrigerating perishable foods within two hours, or within one hour when temperatures exceed 90°F (32°C). FoodSafety.gov
Because spread ingredients and room conditions differ, check the product label rather than treating every decorated cake as having the same storage requirements. Discard cake that develops mold or an off smell.
Making it ahead
The easiest make-ahead plan is to bake the cake base one day ahead. Once fully cool, wrap it well so it stays soft. Decorate with the spread and chocolate pieces before serving.
This approach also helps if you need to transport the cake. A plain, wrapped cake is easier to carry than one with a freshly swirled topping. Take your serving plate and topping with you, then finish it at the destination.
Freezing
For the best texture, freeze the unfrosted cake base. Wrap it tightly after it has cooled completely, then place it in a freezer-safe bag or container. Thaw it while wrapped, let it come to room temperature, and add the chocolate topping afterward.
Freezing the completed cake is possible, but condensation after thawing may change the glossy appearance of the spread. If presentation matters, decorating after thawing is the better option.
Reheating
This cake is intended to be served without reheating. Warming a decorated slice can melt the topping and make the crumb unevenly hot. If a chilled slice tastes too firm, let it stand at room temperature briefly instead.
Frequently Asked Questions
Is there chocolate in the cake batter?
No. In this version, the sponge is vanilla-flavored and the chocolate hazelnut spread goes on top after baking. That arrangement reflects the golden cake and prominent chocolate topping visible in the supplied image.
Can I put chocolate hazelnut spread on the cake while it is warm?
Wait until the cake is completely cool. On a warm cake, the spread may melt, slide, or soak into the surface. Cooling also makes it easier to create visible swirls.
Do I need an electric mixer?
An electric mixer makes creaming butter and sugar easier, but you can make the cake by hand with a sturdy whisk or spoon. Start with properly softened butter and allow a little extra time to mix it thoroughly with the sugar.
How do I know when the cake is fully baked?
Look for a set, golden top and test the center with a toothpick. It should come out clean or with a few dry crumbs, without wet batter. Begin checking before the end of the stated baking range so the cake does not overbake. King Arthur Baking
Can I use a different pan?
A different size changes the batter’s depth and therefore its baking time. The recipe is written for an 8-inch (20 cm) round pan. If you use another pan, watch the cake closely and judge doneness by the center rather than relying on the same minutes.
Can I make the topping thicker?
Yes. The stated ¾ cup gives a generous top layer, but you can add a little more to achieve larger swirls. Keep in mind that a thicker topping makes the cake richer and can make tidy slicing harder.
Does the photo show a filled cake?
The visible image shows a golden round cake with chocolate spread and chocolate pieces on top. It does not clearly establish a filling inside. This recipe recreates what can be seen rather than assuming an unseen center.
Final Thoughts
The charm of this chocolate hazelnut cake lies in its simple contrast: a soft, golden vanilla cake beneath generous chocolate swirls. Give the sponge time to cool, spread the topping with a light hand, and finish with small chocolate pieces for the look that makes the reference photo so appealing.
It is a practical one-pan dessert with enough visual impact to bring to the table whole. Bake the base ahead if needed, decorate before serving, and let each slice show off both the tender crumb and glossy top.