
Tips for the Best Results
Weigh the Dough Portions
Evenly sized rolls rise and bake more consistently. If one is much larger than the others, it may need more time while the smaller ones are already golden.
Keep the Cheese Away from the Seam
Set the mozzarella in the center of the flattened dough, leaving enough plain dough around it to bring the edges together. Wipe stray cheese from the seam before pinching it shut.
Use a Dish with a Little Room
The rolls should have enough space to expand during the second rise, then meet as they bake. Packing them tightly from the beginning can push the dough upward unevenly.
Check the Middle Rolls
The edges of the dish may brown first. Judge doneness using a roll near the center, where the dough is most protected by its neighbors.
Brush, Don’t Drench
Garlic butter tastes wonderful, but too much pooled at the bottom can make the rolls greasy. Brush a little across each top while they are hot, then offer any remaining butter at the table.
Common Mistakes to Avoid
Using hot milk: Very hot liquid can damage yeast. Use milk that feels comfortably warm, then allow the dough to rise in a steady environment.
Adding too much flour while kneading: A stiff dough is easier to handle but produces a heavier roll. Dust the work surface lightly and give the dough time to become smoother as you knead.
Skipping the second rise: Shaped rolls need time to become puffy before baking. Without it, the finished bread can feel dense.
Leaving gaps around the filling: Seal each dough portion firmly and place it seam-side down to reduce cheese leaks.
Baking by color alone: The cheese topping can look done while the bread underneath still needs time. Check a center roll.
Applying raw garlic after baking: Gently warming the garlic in butter before brushing softens its sharp edge. Keep the heat low so it stays fragrant rather than bitter.
Variations and Substitutions
Use Cheddar in the Centers
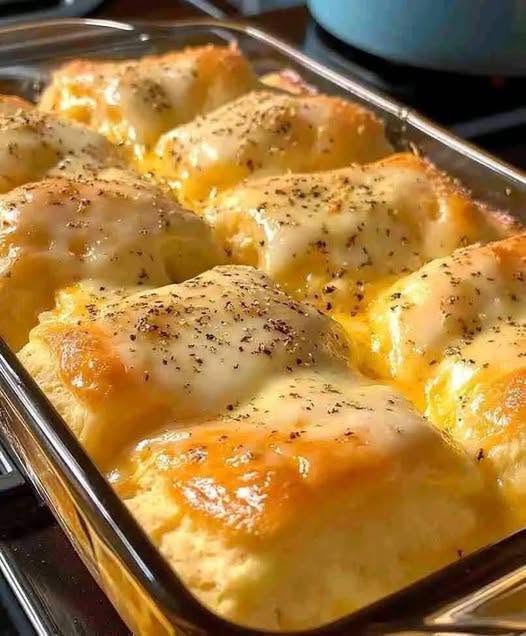
Cut mild or medium cheddar into small cubes and substitute it for the filling mozzarella. Cheddar brings a sharper taste and may melt more freely, so seal the rolls especially well. You can keep mozzarella on top for the look shown in the photo.
Add More Herbs
A little finely chopped parsley in the finishing butter works well. You could also add a small amount of dried Italian seasoning. Keep the herbs restrained so they do not overpower the cheese and bread.
Make Plain Cheese Rolls
Leave the garlic out of the finishing butter. The recipe will still produce soft, cheese-filled rolls with a golden topping.
Add a Little Heat
Stir a small pinch of red pepper flakes into the garlic butter after taking it off the heat. This lets you add warmth without changing the dough.
Bake Without a Filling
If you prefer cheese only on top, shape the dough into plain balls and follow the same rising and baking method. The finished rolls will look similar, but there will be no melted center.
What to Serve with Cheesy Garlic Dinner Rolls
These rolls are a natural partner for tomato-based pasta. Their soft centers are especially good for catching sauce left on the plate. Serve them beside spaghetti, baked pasta, or a simple tomato soup.
They also work with a green salad and a bowl of hearty soup for a lighter dinner. If you have a tomato soup article or an easy pasta dinner already published on your website, a natural internal link fits in this paragraph, where readers are deciding on a meal. Link to your actual recipe page rather than adding a long list of loosely related dishes at the end.
For a holiday table, serve the rolls warm in their baking dish with a towel or trivet underneath. They can stand alongside roasted vegetables and a main dish without needing another spread. The cheese and garlic butter already bring plenty of flavor.
If you are serving children or anyone sensitive to heat, remind them that the cheese in the middle can stay hotter than the outside of the roll.
Make-Ahead Instructions
You can prepare the dough, fill and shape the rolls, then cover the dish and refrigerate it overnight. The next day, remove it from the refrigerator and allow the rolls to become puffy before baking. The time required will vary with the temperature of your kitchen and dough.
If you use a glass dish, avoid moving it directly from a cold refrigerator into a hot oven; follow the manufacturer’s guidance for your specific dish. A metal baking pan may be more convenient for an overnight rise.
For the simplest make-ahead plan, bake the cheesy garlic dinner rolls earlier in the day, let them cool, and rewarm them shortly before serving. Apply the garlic butter after reheating for a fresh aroma. The cheese topping may not look quite as glossy as it does straight from the oven, but the rolls will still be inviting.
Storage, Reheating, and Freezing
How to Store Leftovers
Because these rolls contain a generous cheese filling and topping, cool them promptly and store them in a covered container in the refrigerator. FoodSafety.gov recommends refrigerating perishable foods within 2 hours and keeping the refrigerator at 40°F (4°C) or below.
For the best bread texture, enjoy refrigerated rolls within about 3 days. They will firm up while cold and soften when reheated.
How to Reheat Them
Put the rolls in an oven-safe dish, cover loosely with foil, and warm at 325°F (165°C) until the centers are hot and the cheese has softened again. A few minutes uncovered at the end can refresh the tops. Let them cool briefly before eating.
A microwave works for a single roll, though it can make the bread chewier if heated for too long. Use a short interval, check the center, and repeat only as needed.
Can You Freeze Them?
Yes. Cool the baked rolls, wrap individual pieces well, and freeze them in a suitable airtight container or freezer bag. For the best eating quality, use them within 1–2 months. Thaw in the refrigerator and rewarm before serving.
You can also freeze the rolls without the final garlic butter, then prepare a small fresh batch of butter and garlic after reheating.