
No-Bake Christmas Dessert Everyone Will Love
Christmas desserts don’t always need an oven, complicated layers, or hours of preparation. Sometimes the most memorable holiday treat is the one you can mix together, chill, and bring straight to the table.
This no-bake Christmas dessert is exactly that kind of recipe.
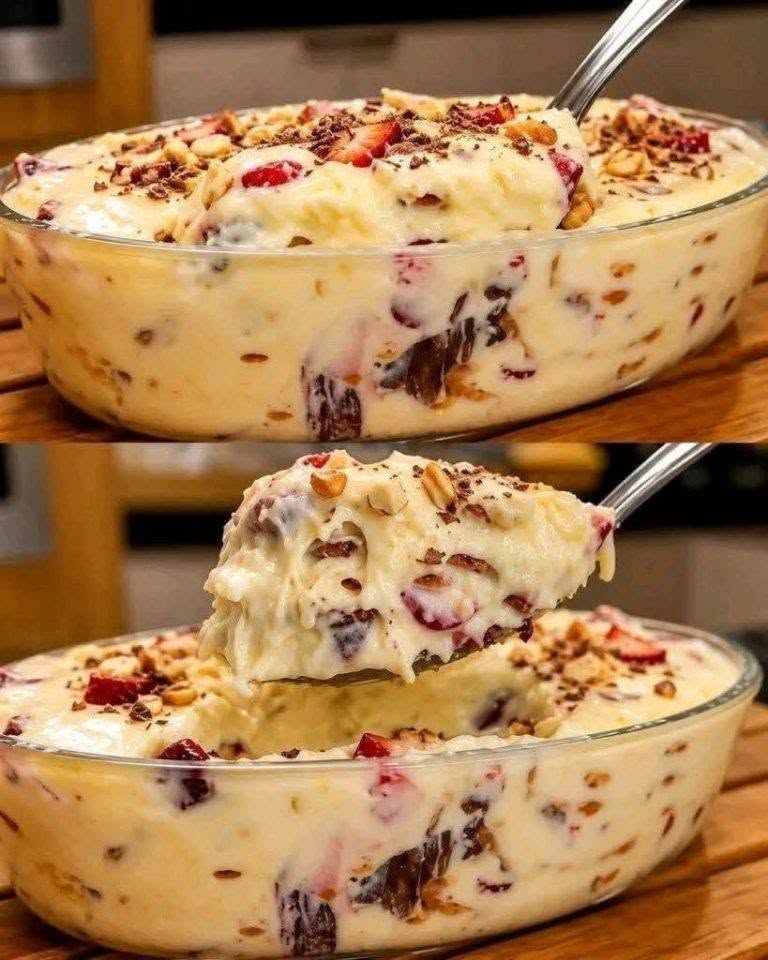
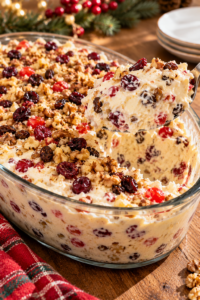
Creamy, rich, slightly fruity, and filled with little bites of dried fruit and crunchy nuts, it has the kind of texture that makes everyone reach for another spoonful. It’s also a wonderful make-ahead option when your oven is already busy with the main Christmas meal.
The dessert pictured here has a soft, creamy consistency with colorful pieces of fruit, dried fruit, and chopped nuts throughout. A generous spoonful reveals just how thick and indulgent the mixture becomes after chilling.
Whether you’re preparing Christmas dinner for the whole family or simply want something sweet to keep in the refrigerator for holiday guests, this recipe is an easy one to keep in your collection.
Why You’ll Love This No-Bake Christmas Dessert
There are plenty of reasons to put a chilled dessert on your holiday menu.
No oven required
The biggest advantage is right in the name. You don’t need to heat up the oven or worry about another baking tray competing for space.
Easy to prepare ahead
Christmas Day can be hectic. Preparing dessert in advance means one less thing to worry about when guests arrive.
Creamy and crunchy
The smooth creamy base is balanced by chewy dried fruit and crunchy nuts, giving every spoonful a different texture.
Perfect for sharing
Instead of making individual desserts, you can prepare everything in one serving dish and let everyone help themselves.
Easy to customize
You can adjust the fruit, nuts, and toppings according to what your family enjoys.
What Makes This Dessert Special?
A good holiday dessert usually needs more than sweetness.
It needs contrast.
The creamy base gives the dessert its richness, while dried fruit adds chewiness and concentrated sweetness. Nuts provide crunch, and colorful fruit makes the dish look festive without requiring elaborate decoration.
Another advantage is the chilled texture.
After several hours in the refrigerator, the ingredients have time to come together. The dessert becomes thicker and more cohesive, making it easy to scoop and serve.
That makes this particularly useful for holiday entertaining.
You can prepare it earlier in the day, refrigerate it, and focus on everything else.
Ingredients You’ll Need
Because the exact recipe quantities are not visible from the reference image, the ingredient list below is designed as a practical version of the pictured creamy dessert rather than a claim that these are the exact original quantities.
Creamy base
- Heavy whipping cream
- Sweetened condensed milk
- Cream cheese or another soft creamy component
- Vanilla extract
Fruit
- Dried cranberries
- Raisins or other dried fruit
- Fresh strawberries or another festive fruit
Nuts
- Chopped walnuts
- Pecans or almonds, if preferred
Optional toppings
- Chopped nuts
- Dried cranberries
- Small pieces of chocolate
- Fresh berries
- A light dusting of grated chocolate
The combination can be adapted according to what you have available.
If you prefer a less sweet dessert, reduce the amount of added sweet ingredients rather than adding more fruit juice or sugar.
How to Make This No-Bake Christmas Dessert
Step 1: Prepare the Fruit and Nuts
Start by preparing all of the ingredients that will be mixed into the creamy base.
If you’re using large pieces of dried fruit, chop them into smaller pieces. This makes the finished dessert easier to scoop and ensures that every serving gets a little bit of fruit.
Roughly chop the nuts as well.
You don’t want them turned into a fine powder. Small pieces are ideal because they provide noticeable crunch without making the dessert difficult to eat.
Set everything aside while you prepare the cream mixture.
Step 2: Prepare the Creamy Mixture
Place the softened cream cheese in a large mixing bowl.
Beat it until smooth and creamy.
Add the sweetened condensed milk gradually, mixing until the ingredients are completely combined.
Add vanilla extract for a little extra flavor.
In a separate bowl, whip the heavy cream until it reaches soft-to-medium peaks.
The whipped cream is important because it gives the dessert a lighter texture.
Step 3: Combine the Mixtures
Gently fold the whipped cream into the cream cheese mixture.
Don’t beat aggressively at this stage.
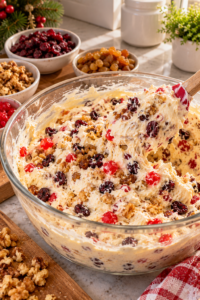
Use a spatula and fold from the bottom of the bowl upward until the mixture becomes smooth and evenly combined.
The goal is to keep as much air in the whipped cream as possible.
Step 4: Add the Fruit and Nuts
Fold in the dried cranberries, raisins, chopped nuts, and any other fruit you’re using.
Reserve a small amount for decorating the top.
This is where the dessert starts to resemble the colorful holiday treat shown in the reference image.
The fruit and nuts should be distributed throughout the mixture rather than concentrated in one area.
Step 5: Transfer to a Serving Dish
Spoon the mixture into a clean glass serving dish.
A shallow dish works well because it gives you more surface area for decorating.
Smooth the top gently with a spatula.
Don’t worry if it isn’t perfectly smooth. A slightly rustic appearance works beautifully for a homemade Christmas dessert.
Step 6: Add the Toppings
Scatter the reserved dried fruit and chopped nuts over the top.
You can also add a few fresh berries or a small amount of grated chocolate if you’d like a more festive presentation.
Keep the decoration relatively simple.
The colorful fruit against the pale creamy base already creates an attractive contrast.
Step 7: Chill Thoroughly
Cover the dish and refrigerate it until the dessert is properly chilled and firm enough to scoop.
Several hours is preferable.
For the best texture, preparing it the day before serving can work especially well, provided all ingredients are stored safely under refrigeration.
For general food-storage guidance, the USDA’s FoodKeeper recommendations are a useful reference for refrigerated foods and leftovers.
Tips for Getting the Best Texture
Soften the cream cheese first
Cold cream cheese can leave small lumps in the mixture.
Allow it to soften before mixing so the base becomes smooth.
Don’t overmix the whipped cream
Once the whipped cream is incorporated, fold gently.
Overmixing can make the mixture heavier and less airy.
Chop the nuts evenly
Very large pieces can make the dessert difficult to scoop.
Small, roughly even pieces distribute better throughout the creamy mixture.
Don’t skip the chilling time
This is one of the most important steps.
A no-bake dessert often needs refrigeration to develop its final texture.
Serving it too soon can leave it softer than intended.
Taste before decorating
If you’re using particularly sweet dried fruit and condensed milk, the mixture may already be sweet enough.
Taste the creamy base before adding additional sugar.
Easy Variations
One of the best things about this no-bake Christmas dessert is how easily you can change the ingredients.
Cranberry and Walnut Version
Use dried cranberries and toasted walnuts for a classic holiday combination.
The tartness of cranberries helps balance the richness of the creamy base.
Chocolate Version
Add small pieces of dark or semi-sweet chocolate.
Chocolate pairs particularly well with dried cranberries and nuts.
Pistachio Version
Replace some of the nuts with chopped pistachios.
The green color is especially attractive on a Christmas dessert table.
Tropical Version
Try chopped dried pineapple, coconut, and macadamia nuts for a completely different flavor profile.
Berry Version
Use chopped strawberries, raspberries, or blueberries.
Because fresh fruit contains more moisture than dried fruit, add it relatively close to serving time if you’re concerned about excess liquid.
Orange-Cranberry Version
Add a little finely grated orange zest to the creamy mixture and pair it with dried cranberries.
Orange and cranberry make a particularly festive combination.
Can You Make It Ahead of Time?
Absolutely.
In fact, making this dessert ahead is one of its biggest advantages.
Prepare it the day before your gathering, cover it well, and refrigerate it.
The chilling time allows the dessert to become colder and more cohesive, while the flavors have more time to blend.
If you’re preparing it for a large Christmas meal, this can free up valuable kitchen time on the day itself.
Just remember that desserts containing dairy and other perishable ingredients should remain refrigerated and shouldn’t be left sitting at room temperature for extended periods.
How to Store It
Keep the dessert covered in the refrigerator.
A tightly fitting lid or food-safe plastic wrap can help protect the dessert from absorbing refrigerator odors.
Because this dessert contains dairy and potentially fresh fruit, don’t treat it as a shelf-stable food.
If it has been sitting out during a gathering for a long period, use proper food-safety judgment rather than returning it to the refrigerator and keeping it for several more days.
For a detailed guide to safe handling and storage of perishable foods, the USDA provides current food-safety recommendations through its official USDA Food Safety and Inspection Service resources.
Can You Freeze This Dessert?
Freezing depends heavily on the exact ingredients.
Cream-based desserts can sometimes change texture after freezing and thawing. Fresh fruit may also release additional water during thawing.
For that reason, if you want the best creamy texture, refrigeration is generally the safer choice for this style of dessert.
If you do experiment with freezing, test a small portion first rather than freezing the entire batch for an important holiday gathering.
How to Serve It
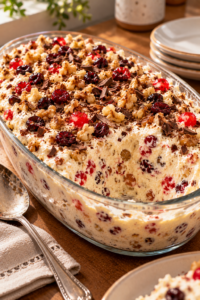
This dessert looks beautiful when served directly from a glass dish.
For a family-style Christmas dinner, place the dish in the center of the dessert table with a large serving spoon.
For a more elegant presentation, spoon individual portions into small dessert glasses.
You can finish each portion with:
- A few dried cranberries
- Chopped walnuts
- Pistachios
- Fresh berries
- A small piece of chocolate
- Orange zest
Don’t overload the topping.
The creamy dessert itself should remain the star.
What to Serve With It
Because this is a rich dessert, drinks that provide some contrast work particularly well.
Coffee
A cup of black coffee balances the sweetness nicely.
Tea
Black tea or lightly spiced tea makes a comforting pairing.
Hot chocolate
For an especially indulgent Christmas dessert table, serve small portions alongside hot chocolate.
Citrus tea
A lemon or orange-based tea can provide a refreshing contrast to the creamy dessert.
Common Mistakes to Avoid
Making the mixture too runny
Adding too much liquid can make the dessert difficult to set.
Keep the creamy base thick.
Using warm ingredients
Very warm ingredients can affect the texture of whipped cream.
Use softened cream cheese, but keep the other chilled ingredients appropriately cold.
Cutting fresh fruit too early
Fresh fruit can release water as it sits.
If you’re using juicy berries, consider adding some of them shortly before serving.
Not chilling long enough
A no-bake dessert doesn’t mean a no-wait dessert.
Refrigeration is part of the preparation.
Adding too many toppings
Too many nuts or fruit pieces can overpower the creamy texture.
Aim for balance.
How to Make It More Festive
You don’t need professional decorating skills to make this dessert look special.
A few simple details can make a big difference.
Use a clear glass serving dish so guests can see the colorful fruit and nuts inside.
Sprinkle a thin layer of chopped nuts across the top.
Add a few dried cranberries for a red Christmas accent.
If you use pistachios, their natural green color can create another festive touch.
You can also grate a small amount of dark chocolate over the surface immediately before serving.
The goal is to make the dessert look abundant and homemade rather than overly decorated.
Why No-Bake Desserts Are Perfect for Christmas
Holiday cooking often means several dishes competing for the same oven.
The turkey or roast may need hours.
Side dishes need reheating.
Bread needs warming.
And suddenly dessert becomes another problem.
That’s why a no-bake Christmas dessert can be such a practical choice.
You can prepare it without using oven space, refrigerate it until needed, and bring it out when dinner is finished.
It also works particularly well for hosts who want to prepare as much food as possible in advance.
Instead of worrying about whether a cake has cooled properly or whether a pie crust has browned evenly, you can focus on the meal and your guests.
A Simple Make-Ahead Christmas Timeline
The day before
Prepare the creamy mixture, add the fruit and nuts, transfer everything to the serving dish, cover, and refrigerate.
Christmas morning
Check the texture and add any finishing decorations if desired.
Before dinner
Keep the dessert refrigerated.
After dinner
Bring it to the table and serve chilled.
This simple schedule makes the dessert especially convenient when you’re hosting.
Frequently Asked Questions
What is a no-bake Christmas dessert?
A no-bake Christmas dessert is a holiday sweet that doesn’t require oven baking. Instead, ingredients are usually mixed together and chilled until they reach the desired consistency.
Can I make this dessert the day before?
Yes. Preparing it in advance is one of the advantages of this type of dessert. Keep it properly covered and refrigerated until serving.
Can I use different nuts?
Yes. Walnuts, pecans, almonds, and pistachios can all work depending on the flavor you’re looking for.
Can I use only dried fruit?
You can. Dried cranberries, raisins, cherries, apricots, or chopped dates can all add sweetness and chewiness.
Can I add chocolate?
Absolutely. Small pieces of chocolate or grated chocolate can make the dessert even more festive.
Why is my no-bake dessert too soft?
It may not have been chilled long enough, or the mixture may contain too much liquid. Give it additional refrigeration time before changing the recipe.
Can I use fresh berries?
Yes, but fresh berries contain more water than dried fruit. Chop them carefully and consider adding them closer to serving time.
How should I store leftovers?
Keep leftovers covered in the refrigerator and follow safe food-handling practices for dairy-based foods.
Is this dessert suitable for Christmas dinner?
Yes. Its make-ahead nature makes it particularly convenient for Christmas gatherings, especially when oven space is limited.
Can I serve it in individual cups?
Yes. Divide the mixture among small dessert glasses before chilling for an easy individual-serving presentation.
Final Thoughts
A good Christmas dessert doesn’t have to be complicated.
This creamy no-bake Christmas dessert combines a smooth, rich base with dried fruit, nuts, and festive toppings to create something that looks special without demanding hours in the kitchen.
Its biggest advantage may be how practical it is.
You can prepare it ahead, keep it chilled, and serve it when the main meal is finished. There’s no oven to monitor, no cake to decorate perfectly, and no complicated pastry to worry about.
The beauty of this dessert is also in its flexibility. Change the dried fruit, swap the nuts, add chocolate, introduce citrus zest, or finish it with colorful berries.
Make it your own while keeping the creamy, chilled character that makes it so appealing.
If you’re planning a Christmas menu and want one dessert that can be prepared ahead while still looking impressive on the table, this is an easy recipe to keep close.
Sometimes the simplest holiday desserts are the ones everyone remembers.