
Choosing the chicken
These chicken puff pastry rolls call for already cooked chicken. Shredded roast chicken is convenient, but you can also cook chicken breasts or thighs specifically for the recipe, then cool and chop them before mixing the filling. Remove bones, skin, and any large pieces of cartilage.
If you cook chicken for this dish, use a food thermometer. The USDA’s safe minimum internal temperature chart specifies 165°F (74°C) for poultry. The baking step for these rolls is designed to heat a cooked filling and bake the pastry; it is not a substitute for properly cooking raw chicken first.
Choosing the pastry
Use puff pastry, sometimes sold simply as ready-rolled pastry. Keep it refrigerated until the filling is ready. Puff pastry rises best when its layers of fat have not become warm and sticky during shaping.
Check your package for thawing instructions. Frozen pastry needs to become flexible enough to unfold without cracking, while remaining cool to the touch. If it becomes very soft on the counter, return it to the refrigerator for a short time before cutting.
How to Make Chicken Puff Pastry Rolls
1. Prepare the filling
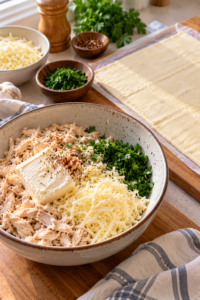
Put the cooked, shredded chicken in a medium bowl. Add the softened cream cheese, grated cheese, parsley, Dijon mustard, garlic powder, pepper, and salt. Mix until the chicken is evenly coated and the filling holds together when pressed with a spoon.
Taste a small amount, provided all the chicken is fully cooked. Adjust the salt only after considering how seasoned your chicken and cheese already are. The filling should be creamy but not pourable. If it seems wet, chill it for 15 minutes; if it is difficult to combine, let the cream cheese soften a little more and mix again.
Make sure the chicken is cool before assembling the rolls. Warm filling can soften the pastry and make the seams difficult to seal.
2. Heat the oven and prepare a tray
Heat the oven to 400°F (200°C). Line a large baking sheet with parchment paper. Leave room between the parcels on the tray so hot air can circulate and the sides can brown.
If your oven runs hot at the back, plan to turn the tray once during baking. Do not crowd all six chicken puff pastry rolls onto a baking sheet so small that they touch as they rise.
3. Cut the pastry
Unroll the cold puff pastry onto a lightly floured surface or its own packaging parchment, if suitable. Cut it into six even rectangles. With a sheet approximately 12 by 16 inches (30 by 40 cm), cut three strips across the short side and halve each strip to make six rectangles of roughly 4 by 8 inches (10 by 20 cm).
Exact dimensions are less important than equal portions. Keeping the pieces similar in size helps them bake at the same rate.
4. Fill and fold
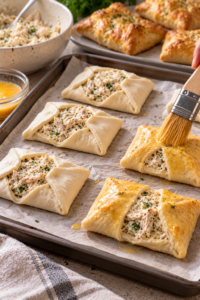
Divide the chicken mixture into six portions. Place one portion on one half of each pastry rectangle, leaving a clear border of approximately ½ inch (1 cm) around the edges. Fold the empty half over the filling to form a compact parcel.
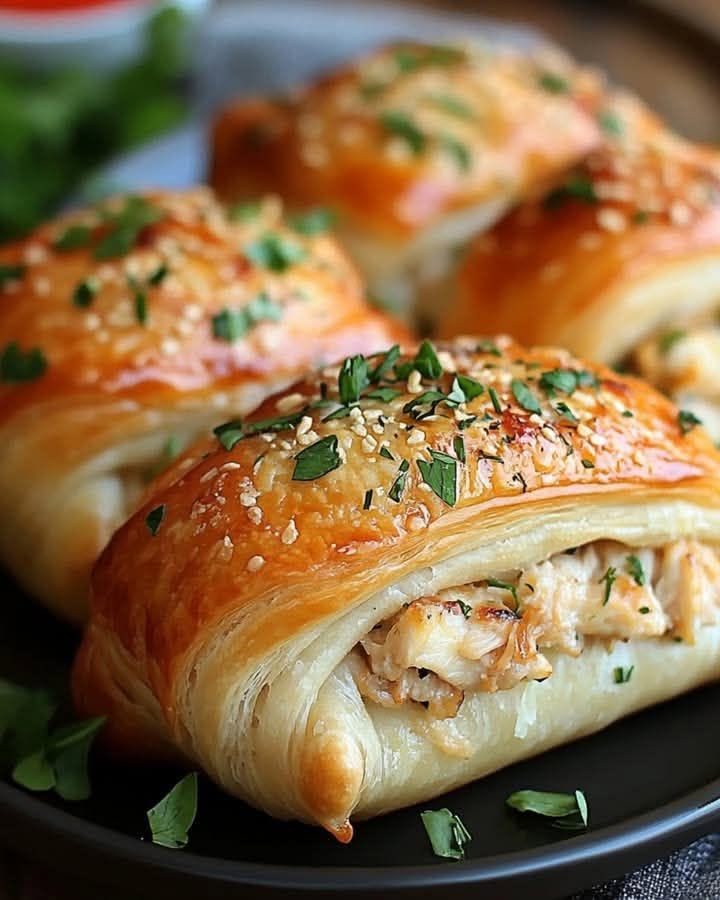
Press the edges together, then crimp them with a fork or pinch them firmly. Transfer the rolls to the prepared tray, spacing them apart. If you would like a small opening where some of the filling is visible, leave a short section at one end unsealed, as in the inspiration photo. Keep the rest of the seam secure so the filling does not spill out as it heats.
Brush the tops lightly with egg wash. Avoid letting a large amount collect along the cut edges, where it may glue pastry layers together. Sprinkle with sesame seeds if using. Cut one or two small slits in the top of each parcel to let steam escape.
5. Chill briefly
Refrigerate the assembled chicken puff pastry rolls for 15 minutes. This short rest firms the pastry after handling and helps the parcels keep their shape when they enter the hot oven.
If you are working in a particularly warm kitchen, this step is helpful. The pastry should feel cool and slightly firm, not greasy or floppy, when you move the tray to the oven.
6. Bake until golden and hot
Bake for 22–28 minutes, until the rolls are puffed, deeply golden on top and at the sides, and the filling is hot. Rotate the tray once if needed for even color.
Check a folded edge before removing the tray. It should look baked and layered rather than pale and damp. If the tops are browning quickly but the sides need more time, move the tray to a lower oven rack for the last few minutes, watching closely.
Let the chicken puff pastry rolls stand for 5 minutes before serving. The filling will be very hot when they first leave the oven, and the short rest makes them easier to pick up or cut.
Tips for Flaky Pastry and Creamy Filling
Keep everything cool during assembly
Cold pastry is easier to cut and fold cleanly. Cool chicken is equally important: it will not melt the pastry’s layers before baking. If shaping takes longer than expected, place the cut pastry rectangles in the refrigerator while you work on the first few parcels.
Avoid a loose filling
The cream cheese should coat and bind the chicken, not create a sauce that runs across the tray. Finely shredding the chicken helps distribute it evenly. If you use very moist chicken, drain off excess juices before mixing.
Seal the edges with a clear border
A spoonful of filling caught in a seam can stop the pastry from closing. Leave space around each portion and press the edges together firmly. The tops will rise and shift during baking, so a reliable seal matters.
Watch the sides, not only the tops
Egg wash can make the tops look golden before thicker folded edges are fully baked. Lift one roll gently with a spatula near the end of cooking and check that its underside is golden rather than soft and pale.
Serve them soon after baking
Puff pastry is at its crispest shortly after it comes out of the oven. The rolls remain enjoyable as leftovers, but a freshly baked parcel has the strongest contrast between flaky outside and creamy center.