
Tips for a Flaky Crust and a Well-Set Filling
Work Quickly with the Dough
You do not need to rush, but avoid leaving the pastry on a warm counter for long periods. If it becomes sticky while rolling, return it to the refrigerator for 10–15 minutes.
Flour the work surface lightly. Too much extra flour can make the pastry dry and tough; just enough to prevent sticking is ideal.
Use a Metal Pan When Possible
Metal heats efficiently and helps the base turn golden. If you use a glass or ceramic dish, baking behavior may differ, so follow the temperature guidance for your particular dish and check both the center filling and crust carefully. Never put a cold glass dish into a hot oven unless its manufacturer specifically says it is safe to do so.
Look for Bubbling Filling
A golden top alone does not mean the pie is finished. Apples and starch need enough heat and time for their juices to thicken. If the vents are quiet and the filling looks watery, continue baking, covering the top loosely if necessary.
Give It Time to Cool
The aroma makes cutting early tempting. Warm apple filling is much looser than cooled filling, and a rushed first slice may fall apart. For portable, neat squares, cool the pie completely.
Choose the Right Thickness for Serving
For a handheld square, use a smaller cut and serve the pie cool or at room temperature. For a plated dessert, a larger rectangle served slightly warm is ideal. The same pan of apple slab pie can suit both occasions.
Common Mistakes to Avoid
Starting with warm butter. Soft butter blends into the flour rather than staying in small pieces. Chill it before you begin.
Adding all the water at once. Flour absorbs moisture differently from batch to batch. Add water gradually and stop when the dough holds together.
Stretching the pastry to fit the pan. Stretched dough tends to shrink during baking. Roll it large enough, then ease it into place.
Using apples cut into very different sizes. Uneven pieces cook at different rates, leaving some mushy and others too firm.
Skipping the vents. Steam needs a way out of a double-crust pie. Cut several openings in the top pastry.
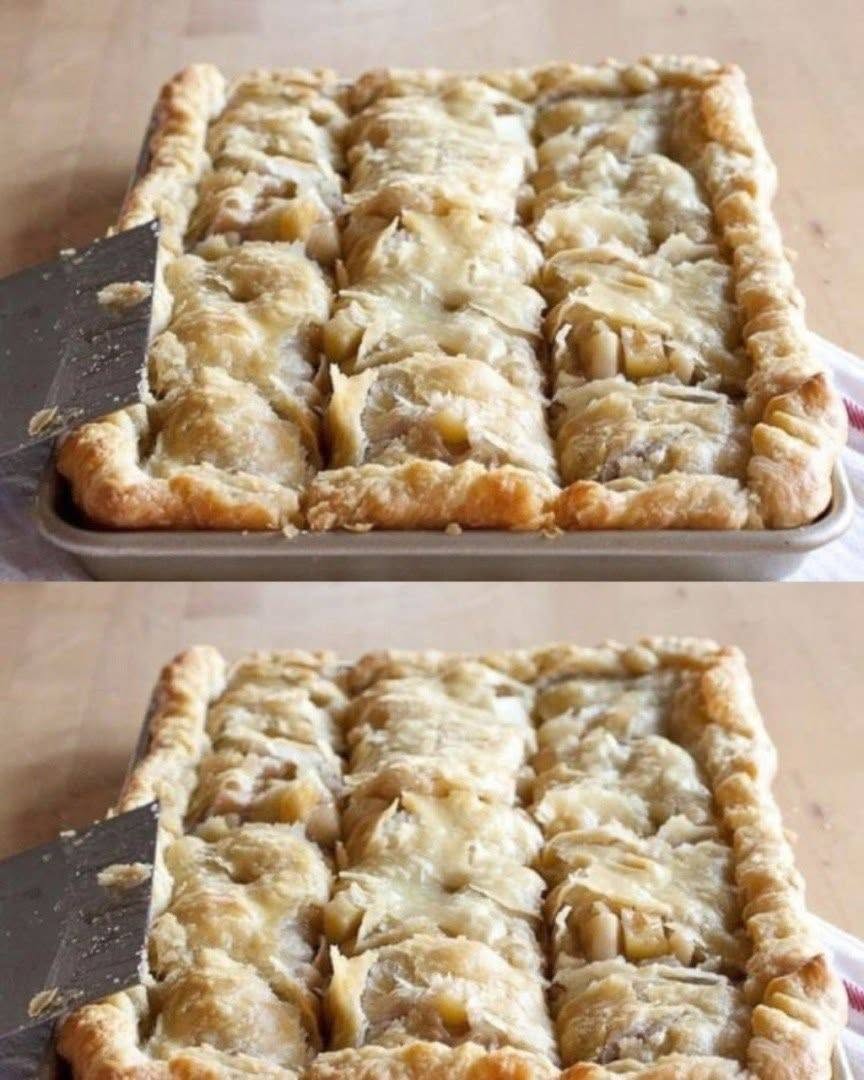
Baking only until the top looks pale gold. Check for a well-baked crust and bubbling apple filling. The pie in your photo has a light, rustic finish, but the filling still needs to cook thoroughly.
Serving immediately from the oven. The flavor will be good, but the slices may not stay intact. Let the pan cool before cutting.
Variations and Substitutions
Apple and Pear Slab Pie
Replace up to one-third of the apple weight with firm pears. Slice them to a similar thickness. Very ripe pears release more juice and can soften quickly, so choose fruit that still feels firm.
Caramel Apple Slab Pie
Drizzle cooled slices with caramel sauce just before serving. Keep the caramel on top or on the plate rather than adding a large amount to the raw filling, where it can make the pastry base wetter.
Apple Cranberry Filling
Add a handful of fresh or frozen cranberries for a tart contrast. The fruit changes the balance of sweetness, so taste a cooked piece of the filling after baking before deciding whether it needs a sweet topping.
Spiced Apple Slab Pie
Add a small pinch of ground ginger or allspice to the filling. Start lightly; cinnamon and apples should remain the leading flavors.
A Simpler Top Crust
If rolling a full top feels difficult, cut the dough into wide strips and lay them across the filling with small gaps. Brush with egg wash as directed. Watch the exposed apples while baking, since they can darken more quickly.
Using Store-Bought Pie Dough
Ready-made pie dough can save time, but check how much you need to line and cover a 9-by-13-inch pan. Standard rounds may need careful joining, and seams should be pressed firmly to prevent leaks. Baking time still depends on crust color and bubbling filling.
If you enjoy baking for gatherings, this apple slab pie also fits naturally beside other treats in the VeloraTaste dessert collection. velorataste.com
Serving Suggestions
A square of apple slab pie needs very little decoration. Serve it at room temperature when you want the cleanest slices and the flakiest crust. A light dusting of powdered sugar can look attractive, but add it only after the pie has cooled or it will dissolve.
For a more indulgent dessert, warm a portion gently and add vanilla ice cream. The cold ice cream against the warm apples is a classic combination. Whipped cream is another option, especially if you serve the pie after a large meal and want something lighter on the plate.
For an afternoon gathering, cut the pan into 16 smaller squares and arrange them on a platter. They are easy to offer with coffee or tea, and guests can take one without needing a bowl. Keep a small spatula nearby because a fruit-filled pastry is more delicate than a cake bar.
How to Store, Freeze, and Reheat Apple Slab Pie
Refrigerating Leftovers
Once the pie has cooled, cover it and refrigerate it for up to 4 days. Store cut squares in an airtight container with parchment between layers if you need to stack them. Refrigeration softens pastry over time, so reheating can help restore some crispness.
For general safe-handling guidance, FoodSafety.gov advises refrigerating perishable prepared foods promptly rather than leaving them out for extended periods. See its food-safety guidance for prepared foods and leftovers. FoodSafety.gov
Freezing
Cool the pie completely, then freeze cut pieces on a tray until firm. Wrap them individually and place them in a freezer-safe container. Use within 2 months for best quality.
Thaw in the refrigerator before reheating. Freezing portions individually lets you take out just what you need and helps protect the crust from being crushed.
Reheating
Place slices on a baking tray in a 325°F (160°C) oven for about 10–15 minutes, until warmed through. Timing depends on slice size and whether the pie is cold from the refrigerator. Cover loosely with foil if the pastry begins to darken.
A microwave is quicker but will soften the crust. If a crisp pastry is important to you, use the oven.
Frequently Asked Questions
What is the best pan for apple slab pie?
A 9-by-13-inch (23-by-33-cm) metal baking pan with raised sides works well for this recipe. It contains the fruit juices and helps the base bake through.
Can I make the pastry the day before?
Yes. Make and wrap the two dough rectangles, then refrigerate them overnight. If the dough is very firm the next day, let it sit briefly until it can be rolled without cracking.
Should I cook the apples before putting them in the pie?
No. Thinly sliced raw apples cook as the pastry bakes. Keep the slices relatively even and bake until the filling bubbles in the center.
How can I tell whether the bottom crust is baked?
A metal pan and a rack in the lower third of the oven help. After cooling, lift a corner piece carefully and look at its underside: it should appear baked and lightly colored rather than gummy.
Why did my apple filling run when I cut it?
The pie may have been cut while hot, the filling may not have bubbled sufficiently during baking, or the apples may have released unusually large amounts of juice. Measure the cornstarch accurately and cool the pie for at least 2 hours.
Can I use only Granny Smith apples?
Yes. The result will be more tart. If you prefer a sweeter filling, use a mix of Granny Smith and a firm, sweet apple.
Can I make apple slab pie without an egg wash?
Yes. The pastry will bake without it, though the top may look less glossy. You can lightly brush it with milk or leave it plain.
Can I assemble the pie in advance?
You can prepare the pastry and sliced apple filling separately in advance. For the best crust, assemble shortly before baking. Once the apples sit in the unbaked shell, their juices begin to moisten the base.
How many people does one pan serve?
Cut this recipe into 12 generous dessert portions or 16 smaller pieces for a party tray. The number depends on what else you are serving.
Final Thoughts
A homemade apple slab pie gives you the familiar pleasure of apple pie in a format that is easier to share. Keep the pastry cold, slice the apples evenly, bake until the filling bubbles, and allow the pan to cool before cutting. Those simple steps give you tender apples and flaky pastry in every square.
The rustic, rectangular finish is part of its appeal. Set the pan on the table, cut a few pieces, and let everyone choose their favorite corner, edge, or center slice.
Recipe Card: Apple Slab Pie
Yield: 12 large or 16 small servings
Prep time: 35 minutes
Chill time: At least 1 hour
Bake time: 50–60 minutes
Cooling time: At least 2 hours
Pan: 9 by 13 inches (23 by 33 cm)
Ingredients
Pastry
- 3 cups (375 g) all-purpose flour
- 1 tablespoon granulated sugar
- 1 teaspoon fine salt
- 1 cup (226 g) cold unsalted butter, cubed
- Up to ¾ cup (180 ml) ice-cold water
Filling
- 3 pounds (1.35 kg) apples, weighed before peeling and coring
- ½ cup (100 g) packed light brown sugar
- ¼ cup (50 g) granulated sugar
- ¼ cup (32 g) cornstarch
- 1 tablespoon lemon juice
- 1½ teaspoons ground cinnamon
- ¼ teaspoon ground nutmeg
- ¼ teaspoon fine salt
Finish
- 1 large egg
- 1 tablespoon water
- 1 tablespoon coarse sugar, optional
Instructions
- Mix the flour, sugar, and salt. Work in the cold butter until some pea-sized pieces remain. Add cold water gradually, just until the dough holds together. Divide into two rectangles, one slightly larger, and chill for at least 1 hour.
- Wash, peel, core, and slice the apples about ¼ inch (6 mm) thick. Toss with both sugars, cornstarch, lemon juice, cinnamon, nutmeg, and salt.
- Heat the oven to 400°F (200°C). Lightly grease a 9-by-13-inch (23-by-33-cm) metal pan.
- Roll the larger dough portion to approximately 13 by 17 inches (33 by 43 cm) and line the pan. Add the apple filling evenly.
- Roll out the second dough portion and cover the apples. Seal the edges and cut several slits in the top.
- Beat the egg with 1 tablespoon water. Brush over the pastry and add coarse sugar if desired.
- Bake for 20 minutes at 400°F (200°C). Reduce the oven to 375°F (190°C) and bake 30–40 minutes more, until the pastry is golden and the filling bubbles through the center vents.
- Cool for at least 2 hours before cutting into 12 or 16 pieces.